French Drain Installation in a Charleston Crawl Space: A Step-by-Step Guide
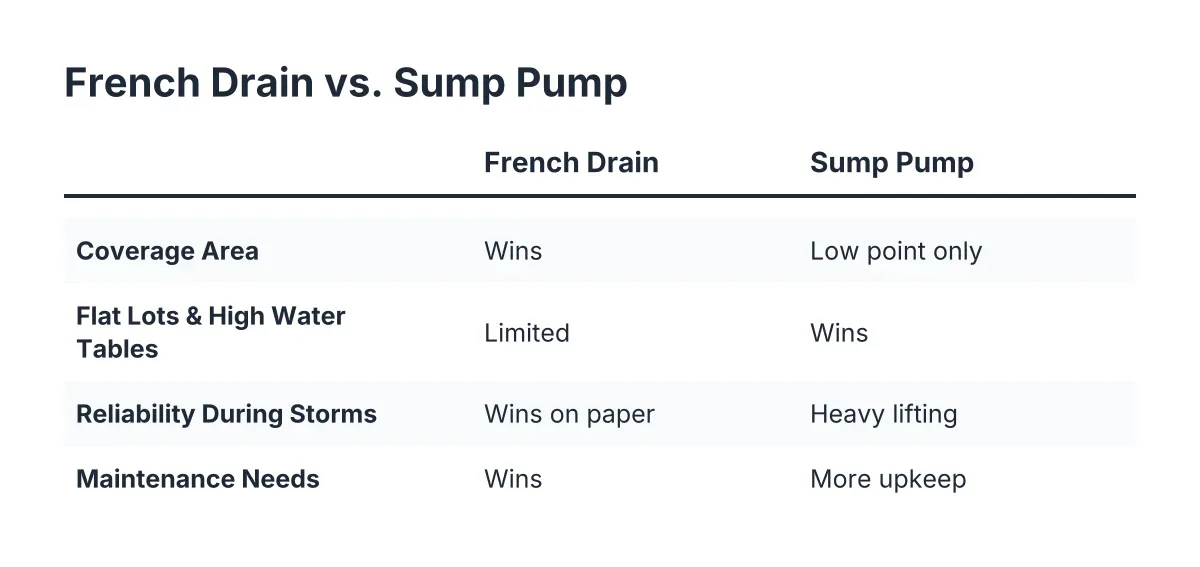
If water keeps showing up under your house after every heavy rain, a French drain installation is usually the fix that actually solves it. Charleston sits on a high water table, and many crawl spaces here flood or hold standing water for days after a storm. Fans and vents will not remove that water. Once it gets trapped under the house, it needs a drainage system to carry it out. This guide walks through how a proper crawl space French drain installation works, step by step, so you know what a correct job looks like before anyone digs a trench under your home.
This matters if you have noticed a soft or bouncy spot in the floor. Standing water feeds the rot that weakens floor joists and beams. According to the American Society of Home Inspectors, more than 60% of U.S. homes have had water or moisture problems in their basement or crawl space. In Charleston, with tidal lots and hurricane-season rain, the odds run against you. NOAA Tides and Currents recorded 17 high-tide flood days here during the 2023-24 meteorological year, a record for the city.
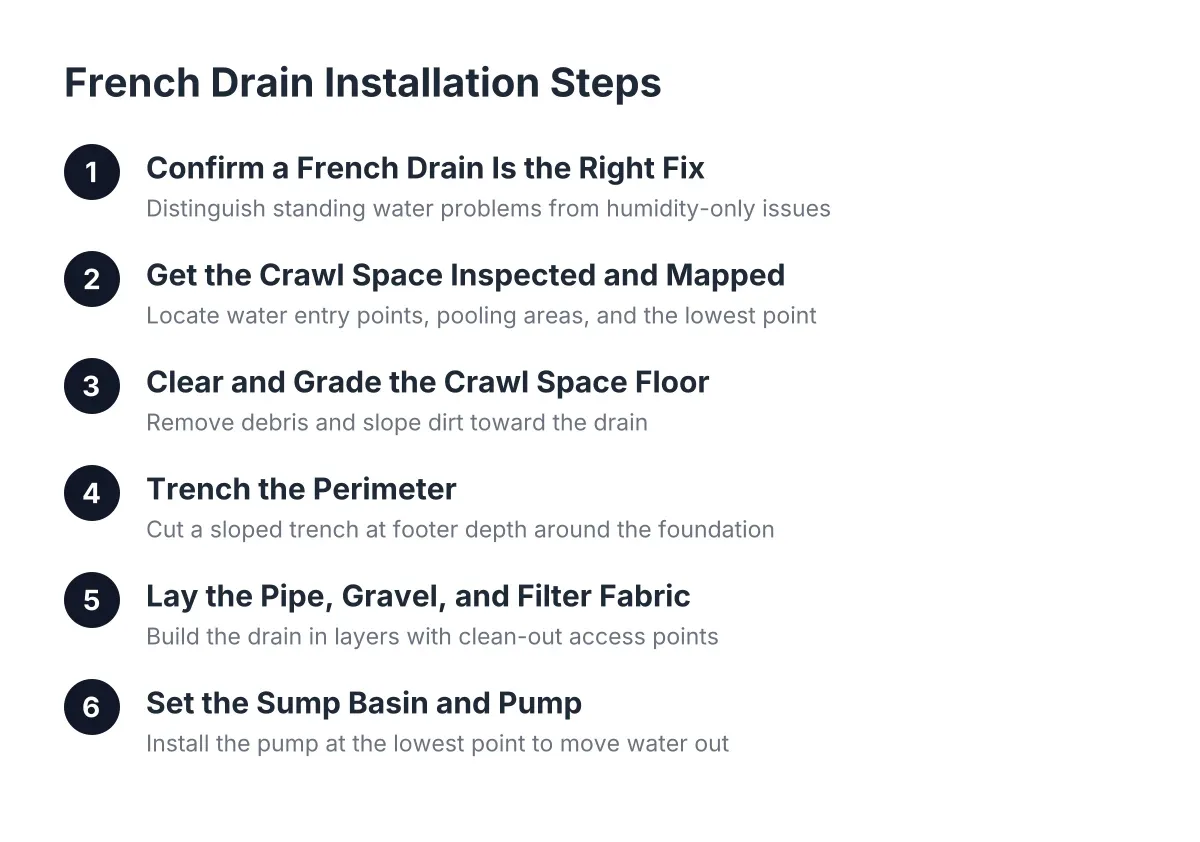
Step 1: Confirm a French Drain Is the Right Fix
Start by figuring out whether your problem is standing water or humidity, because they need different solutions. A French drain system handles liquid water: puddles after rain, water seeping under the footing, or a crawl space that turns into a shallow pond during a storm. It does not fix a musty smell caused by humid air alone. If your crawl space is damp but never holds water, a vapor barrier and dehumidifier may solve it without any digging.
Here is a simple test. Go look under the house 24 to 48 hours after a hard rain. If you see puddles, mud that stays saturated for days, or water lines on the piers, you have a drainage problem. If the dirt is dry but the air feels thick and the wood is damp, you have a humidity problem.
For example, suppose a homeowner in West Ashley notices the hallway floor flexing and finds two inches of water under the house every time a summer storm rolls through. In that scenario, a dehumidifier alone would fail; the water source has to be intercepted and pumped out first. A graduated approach works best: fix the water, then address humidity, then add encapsulation only if the space still needs it. That order keeps you from paying for a full system you may not need.
Step 2: Get the Crawl Space Inspected and Mapped
Before any trenching, the crawl space needs a real inspection. A specialist should crawl the full footprint and note where water enters, where it pools, and where the lowest point sits. That lowest point matters because it determines where the sump basin goes. The inspection should also check the floor joists and beams for rot, since standing water and sagging floors often show up together.
If your floors already feel soft, ask the inspector to separate the two issues in writing: what the drainage fix costs, and what any structural support or beam repair costs. This is where homeowners fear a $500 problem turning into a $20,000 one. A clear inspection report keeps the scope honest, and it gives you something concrete if you want a second opinion. If you are selling the house and an inspection report already flags crawl space moisture, that report becomes the punch list; the drainage contractor should address each flagged item so the repair satisfies the buyer's inspector before closing.
Step 3: Clear and Grade the Crawl Space Floor
Next, the crew removes debris, old fallen insulation, and any failed plastic sheeting from the crawl space floor. You cannot dig an accurate trench through construction trash, and old wet material holds moisture against the wood above.
Then comes grading. According to the Building America Solution Center (PNNL/DOE), grading and leveling the crawl space dirt before installing a drainage system, sloping it slightly toward the drain, helps water flow into the perimeter drain and sump pump instead of pooling in the middle. This step gets skipped on rushed jobs, and it shows later as a puddle sitting in the center of the crawl space while the drain along the wall stays dry.
Step 4: Trench the Perimeter for the French Drain Installation
Now the actual digging starts. The crew cuts a trench around the interior perimeter of the foundation wall, at or near footer depth along the foundation beam. That depth matters in Charleston. Our water table pushes groundwater sideways under footings, and a shallow trench misses it. A footer-depth drain intercepts groundwater before it spreads under the house.
According to the Building America Solution Center (PNNL/DOE), a perimeter drain installed around the interior of a crawl space foundation wall is designed to intercept water entering under the foundation and channel it to a sump pump. The trench must slope continuously toward the sump basin location so water moves by gravity. A flat trench lets water sit in the pipe, which defeats the whole system. On rare lots with enough natural fall, gravity alone can carry water to daylight without a pump, but that is uncommon on Charleston's flat, low-lying ground.
Step 5: Lay the Pipe, Gravel, and Filter Fabric
With the trench cut and sloped, the drain gets built in layers. A proper French drain installation follows this sequence:
- Line the trench with filter fabric to keep Lowcountry silt and sand out of the gravel.
- Add a base layer of clean, washed gravel.
- Set perforated drain pipe on the gravel with the slope checked, running toward the sump basin.
- Cover the pipe with more gravel, then wrap the fabric over the top.
- Install clean-out access points so the line can be flushed and serviced later.
Those clean-outs separate a professional job from a buried problem. Any catch basins or solid discharge lines should tie into the system with their own access points too. Without them, a clogged drain years from now means digging the whole thing up again.
Step 6: Set the Sump Basin and Pump
The sump basin gets set at the lowest point identified during inspection. The perimeter pipe feeds into it, and the pump pushes collected water out through a solid discharge line to a spot well away from the foundation. In flood-zone and tidal lots around Charleston, a battery backup pump is worth considering, since the storms that flood crawl spaces are the same ones that knock out power.
According to the Building America Solution Center (PNNL/DOE), a sump pump in an encapsulated crawl space also serves as an emergency feature, since a sealed crawl space otherwise traps water like a pool if a pipe bursts. Even if you plan to encapsulate later, the basin and pump go in first. As a rough illustrative range, a full interior perimeter drain with a sump pump in a Charleston-area crawl space often lands somewhere in the low-to-mid four figures depending on footprint and depth, which is why sellers facing an inspection deadline usually negotiate it into closing rather than walk from the deal.
Step 7: Test the System and Verify the Slope
Before anything gets covered or sealed, the system needs a water test. The crew runs water into the trench and confirms it travels the full perimeter, reaches the basin, and triggers the pump. They also confirm the discharge line carries water away from the house instead of dumping it back against the foundation, where it would just cycle through again.
Ask to see this test, or ask for photos and video. A French drain before and after comparison, dry gravel trench versus the old standing water, is reasonable documentation to request, and it is useful evidence if you are handing repair records to a buyer's agent.
Step 8: Decide What Comes Next: Vapor Barrier, Dehumidifier, or Encapsulation
Drainage solves the standing water, but Charleston's humidity does not stop at the foundation wall. After the water problem is fixed, evaluate what the space still needs. A vapor barrier across the floor blocks ground moisture. A crawl space dehumidifier handles the humid air that drives mold growth and that musty smell upstairs; its condensate line can drain straight into the sump basin. Full crawl space encapsulation seals the entire floor and stem walls, according to the U.S. Department of Energy, rather than laying plastic loosely on the ground.
However, add these in order of need, not all at once. Many crawl space drainage systems perform well on their own for a house whose only issue was storm water. One caution: if your floors sag or joists show rot, drainage alone will not restore the structure. Rotted wood needs beam repair or support jacks, and that is a job for a professional who can assess load, not something to bundle blindly with a drain. About 15% of American homes sit on a crawl space foundation, according to JSE Labs, and the ones in the Lowcountry face water conditions most national how-to guides never account for. Get the drainage designed for this ground, test it before it is buried, and the floor above it stops getting worse.
If you need crawl space encapsulation, Low Country Crawl Space Repair can help.
Prefer to talk it through? Call +18542013678 — a quick call is usually the fastest way to get a straight answer for your situation.