When a Crawl Space Inspection Reveals Moisture Damage: Red Flags and Next Steps
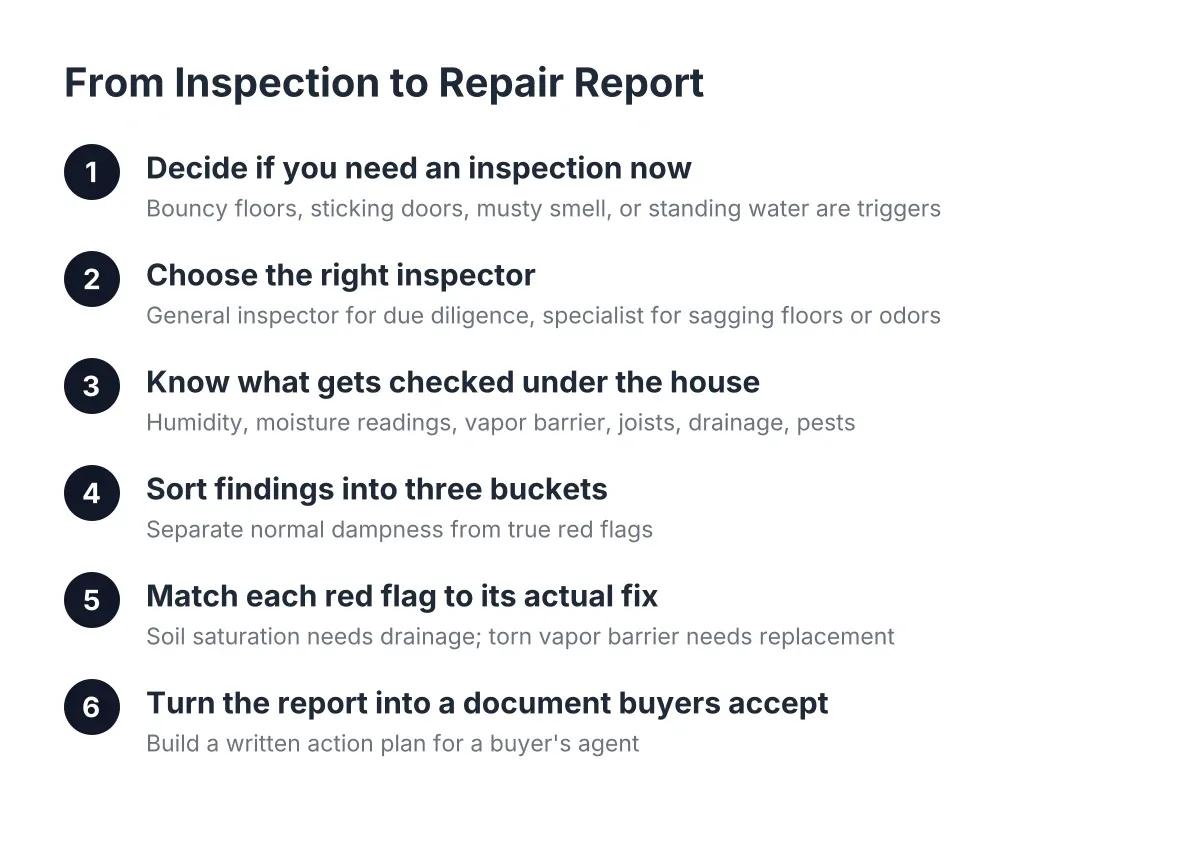
Your floor feels bouncy in the hallway. A door that closed fine last spring now sticks. Then a friend mentions rotted floor joists, and suddenly you are wondering what a crawl space inspection reveals when someone actually goes under the house and looks. This guide walks you through the process step by step: what an inspector checks, which findings are red flags versus normal Lowcountry dampness, and how to turn a report full of jargon into a written action plan. If you are selling your home, that plan is something you can hand straight to a buyer's agent instead of losing the deal over a scary-sounding report. Understanding how crawl space moisture damage develops and how to address it is essential for any homeowner in this region.
Moisture problems in crawl spaces are not rare. More than 60% of U.S. homes have had water or moisture problems in their basement or crawl space, according to the American Society of Home Inspectors. In Charleston, with year-round coastal humidity, high water tables, and tidal flooding, the odds run higher than that. NOAA Tides and Currents recorded 17 high-tide flood days in Charleston during the 2023-24 meteorological year, a record for the city. Water finds its way under older raised pier-and-beam homes here. The question is not whether your crawl space has seen moisture. The question is how much damage that moisture has done, and what the fix actually looks like.
Step 1: Decide Whether You Need a Crawl Space Inspection Now
You need a crawl space inspection now if you notice sagging or bouncy floors, sticking doors or windows, a musty smell inside the house, or visible water after rain. You also need one before listing a home for sale, since a buyer's home inspector will go under the house whether you have or not.
The reasoning is simple. Crawl space problems follow a predictable chain: moisture leads to mold, mold leads to wood rot, rot leads to structural damage, and damaged wood invites pests. Every problem downstream traces back to moisture. Catching the chain early, at the damp-vapor-barrier stage, costs far less than catching it at the rotted-beam stage. Moisture problems in a crawl space do not fix themselves; they get worse, and waiting raises the price of the repair.
Sellers have an extra reason to move first. Water intrusion found during a buyer's home inspection can be serious enough to threaten the purchase agreement. Getting your own inspection first puts you in control of the story and the repair timeline.
Step 2: Choose the Right Kind of Inspector
Pick an inspector based on what you already suspect. A general home inspector gives a broad overview, which works for routine due diligence. However, if your floors are sagging or the musty smell is strong, go straight to a crawl space specialist who does structural support and moisture control work every day. Specialists can measure wood moisture content, evaluate joists and beams, and tell you whether you need a full foundation inspection on top of the crawl space work.
Be aware of the trade-off. A contractor who inspects and also repairs has an incentive to find work. You can manage that risk without giving up the specialist's expertise:
- Ask for photos and moisture readings attached to every finding, not just a verbal summary.
- Ask the inspector to explain how they distinguish soil saturation, which needs drainage and waterproofing, from a torn vapor barrier, which needs only replacement. A skilled inspector can tell the difference from physical evidence under the house.
- Ask how they handle vapor barriers, capillary breaks, and moisture testing. A contractor who cannot explain those basics is a red flag for poor moisture planning.
- Get a second opinion before committing to any structural repair over a few thousand dollars. A trustworthy contractor will not pressure you out of one.
Many Charleston-area crawl space companies offer a free crawl space inspection, while a standalone structural engineer's foundation inspection typically runs a few hundred dollars as of 2026. That engineer fee is an illustrative estimate, and it can be money well spent when the findings are structural.
Step 3: Know What the Inspector Checks Under the House
A thorough inspector works through a consistent checklist. Humidity comes first, since checking the crawl space humidity level is typically the opening move of any mold inspection. From there, the inspection covers:
- Relative humidity and wood moisture readings, taken in all four corners and the center, not one spot, since levels vary across the space
- Standing water, water staining, and efflorescence on piers and foundation walls
- The vapor barrier: coverage, tears, gaps, and whether it is sealed or just loose plastic on the dirt
- Floor joists, beams, sills, and subfloor for soft spots, rot, and mold growth
- Sagging or over-spanned framing, failed shims, and settling piers under bouncy floor areas
- Insulation condition, since wet fiberglass batts falling from the joists signal a long-running humidity problem
- Drainage clues: grading, downspout discharge, and whether water flows toward or away from the foundation
- Ventilation, air sealing, and ductwork condition, which affect indoor air quality upstairs
- Pest evidence and debris, since damp rotted wood attracts termites and other pests
About 15% of American homes sit on a crawl space foundation, according to JSE Labs, but in older Charleston neighborhoods the raised pier-and-beam crawl space is the default. That means vented crawl spaces pulling in humid coastal air all summer, which is why moisture readings matter more here than in drier markets.
Step 4: Sort the Findings a Crawl Space Inspection Reveals into Three Buckets
Once the report is in hand, sort every finding into one of three buckets: normal, moisture red flag, or structural red flag. This is the step that keeps a $1,500 problem from being treated like a $15,000 one, or the reverse.
Normal for the Lowcountry
Some dampness around the perimeter after a heavy rain is common in pier-and-beam homes and is not by itself alarming. Minor surface staining on piers, a slightly musty smell in a vented crawl space in August, and small vapor barrier wrinkles fall in the same bucket. Context matters, though; the same perimeter dampness during a dry summer stretch would be a bigger concern.
How Crawl Space Moisture and Damage Progress
These findings mean the moisture problem is active and needs correction before it becomes structural:
- Standing water or mud that persists days after rain
- Wood moisture readings high enough to support mold growth and rot
- Visible mold on joists or subfloor, which calls for mold remediation, not just drying
- A missing, torn, or badly gapped vapor barrier
- Condensation dripping from ducts or insulation hanging wet from the joists
Structural red flags
These are the findings the Sagging-Floor Worrier fears, and they need a repair plan, sometimes a full foundation inspection:
- Rotted or cracked joists and beams, especially under the bouncy floor area
- Sills softened by long-term moisture contact
- Leaning or settling piers, or failed shims and posts
- Noticeable floor slope measurable from the living space above
Here is the reassuring part. Most of what a crawl space inspection reveals lands in the first two buckets. Even structural findings are usually repairable with crawl space support jacks, sistered joists, or beam repair, not a rebuilt foundation.
Step 5: Match Each Red Flag to Its Actual Fix
Match every finding to a specific repair so the report becomes a plan instead of a scare. The pairings are consistent:
- Humid air and condensation: moisture control with a sealed crawl space dehumidifier, sometimes as part of full crawl space encapsulation
- Ground moisture and a failed liner: vapor barrier installation, sealed to the stem walls and around supports rather than laid loose, which the U.S. Department of Energy describes as the defining feature of encapsulation
- Standing water: drainage first, then sealing; a perimeter drain inside the foundation wall intercepts water and channels it to a sump pump, according to the Building America Solution Center, and grading the crawl space dirt to slope toward the drain keeps water from pooling in the middle
- Mold growth: mold removal and remediation before any encapsulation, since sealing mold in solves nothing
- Rotted framing and sagging floors: structural support with jacks, sistered or replaced joists, and beam repair, followed by moisture control so the rot does not return
Order matters. Fix drainage and standing water first, then remediate mold, then repair structure, then encapsulate and dehumidify to keep it dry. Encapsulating over an unsolved water problem wastes the entire investment. One local code note: Stego Industries points out that some states require a termite inspection strip near the top of the foundation wall to stay uncovered by the vapor barrier, so confirm local requirements before sealing.
Step 6: Turn the Report into a Document a Buyer's Agent Will Accept
Convert the inspection into a one-page action plan with three columns: the finding with a photo and moisture reading, the specific repair, and the status or scheduled date. This is what separates a deal-killing report from a routine disclosure. Buyer's agents do not panic over findings; they panic over unknowns.
For example, suppose a homeowner in West Ashley lists a 1960s brick ranch, and the buyer's inspector reports "elevated moisture, fungal growth on joists, inadequate vapor barrier." Raw, that language can sink negotiations. Translated into a plan, it might read: mold remediation completed on six joists with photos attached, new sealed vapor barrier installed, dehumidifier running with humidity logged at 52%, and one sistered joist under the hallway. In that scenario, the same findings become evidence the crawl space is now in better shape than most homes on the street.
Keep every invoice, photo set, and follow-up humidity reading in one folder. If your home already has encapsulation and installed equipment, annual crawl space inspections with dehumidifier service and sump pump checks generate exactly this paper trail, and they catch new problems while they are still small. After hurricane season is a smart time to schedule one in Charleston.
Step 7: Know When to Bring in Additional Professionals
Call a structural engineer when the inspection reveals significant beam or pier movement, when repair bids differ widely, or when a buyer's lender wants an independent stamp. Foundation inspection cost from an engineer is a fraction of the repair budget it protects, and an unbiased report carries weight in negotiations that a contractor's estimate cannot.
Two other specialists come up in Lowcountry crawl spaces. If the inspector finds termite damage alongside the rot, a licensed pest professional needs to treat before wood repair starts. And since South Carolina's average indoor radon level is about 1.9 pCi/L, above the national average of 1.3, according to Radon.org, a radon test is a reasonable add-on when you are already sealing the crawl space.
One honest limitation: no article can grade your specific crawl space. Moisture readings, framing condition, and drainage all depend on your lot, your soil, and your home's construction. Use these steps to understand the report and ask sharp questions, then let a qualified professional confirm what your crawl space inspection reveals before you commit to a repair scope. A sagging floor caught at this stage is a fixable problem, not a foundation crisis.
If you need crawl space encapsulation, Low Country Crawl Space Repair can help.
Prefer to talk it through? Call +18542013678 — a quick call is usually the fastest way to get a straight answer for your situation.